
WPC Flooring Installation: A Comprehensive Guide for Commercial and Industrial Projects
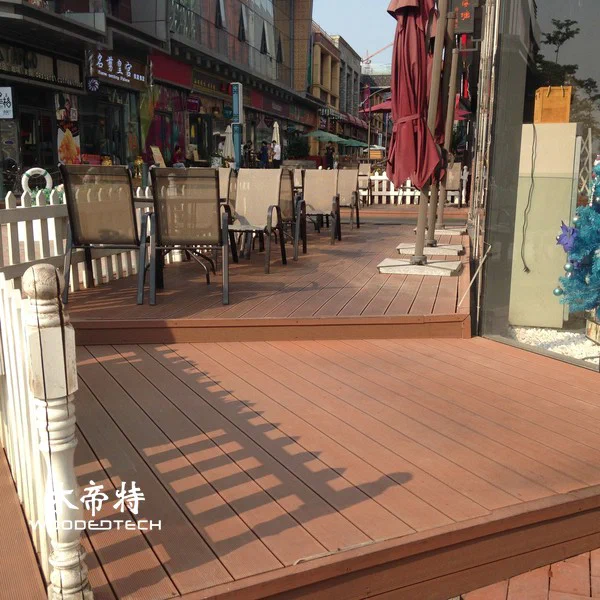
WPC flooring installation for commercial and industrial projects requires careful planning, a stable subframe, correct fixing methods, and sufficient expansion gaps. Whether installing outdoor decking or exterior wall cladding, following the manufacturer’s specifications and proper installation procedures helps ensure structural stability, effective drainage, and long-term performance.
1. Prepare the Installation Surface and Subframe
Before installing WPC decking, inspect the site and confirm that the ground or supporting structure is suitable for the intended loads. Commercial and industrial environments often experience heavier foot traffic and more demanding operating conditions than residential spaces, making subframe preparation particularly important.
For ground-level installations, prepare a firm, well-compacted base. A concrete foundation is generally suitable, provided it has adequate drainage and a slight slope to prevent standing water. For elevated installations, check that the supporting structure can safely carry the expected dead and live loads.
Next, install the supporting joists. Depending on the project design, these can be made from aluminum, galvanized steel, or treated structural materials approved for the application. Aluminum joists are often preferred for commercial outdoor projects because of their corrosion resistance and dimensional stability.
Keep the following points in mind:
- Install joists at the spacing specified by the WPC decking manufacturer. Closer spacing may be required for heavy-traffic areas.
- Ensure that all joists are level, properly aligned, and securely anchored.
- Provide adequate ventilation beneath the decking.
- Allow sufficient clearance for drainage and water circulation.
- Add additional support beneath board joints, edges, and areas subject to concentrated loads.
A properly prepared subframe prevents excessive movement, uneven surfaces, and premature damage.

2. Install WPC Decking Boards
Once the subframe is complete, the decking boards can be installed. Before fixing them, check the boards for consistent dimensions, surface quality, and color. It is advisable to mix boards from different packages to create a more uniform appearance.
For most commercial WPC decking systems, concealed fastening clips provide a clean surface without exposed screws. The installation process generally follows these steps:
- Position the first decking board along the starting edge of the subframe.
- Secure it using the manufacturer’s designated starter clips or approved face-fixing method.
- Insert intermediate clips into the board grooves at every supporting joist.
- Position the next board and engage its groove with the installed clips.
- Continue across the installation area, checking alignment and spacing regularly.
- Secure the final board using the recommended end clips or approved visible fasteners.
For high-traffic commercial applications, use only the fastening components approved for the selected decking system. Do not replace proprietary clips with generic alternatives without confirming compatibility.
Where face fixing is permitted, use suitable corrosion-resistant screws and follow the specified pre-drilling and edge-distance requirements.
3. Allow for Expansion and Contraction
WPC decking contains wood fibers and thermoplastic materials. Like other composite building products, it expands and contracts as temperatures change. Insufficient expansion clearance can cause boards to buckle, push against surrounding structures, or develop unwanted movement.
Expansion gaps should be provided between:
- Adjacent board ends.
- Decking boards and walls or other fixed structures.
- Boards and perimeter trims.
- Decking sections around columns, drains, and other obstructions.
The required clearance depends on board length, installation temperature, material formulation, and the manufacturer’s recommendations. Follow the product-specific installation chart rather than applying one universal gap measurement.
For large commercial projects, plan expansion joints and installation sections before laying the first board. Avoid tightly fitting boards against fixed structures, and ensure that the subframe design accommodates the expected movement.
4. Cutting and Finishing WPC Boards
Accurate cutting is essential for professional installation, particularly around corners, drainage channels, columns, and building entrances.
WPC boards can generally be cut using standard woodworking power tools equipped with suitable carbide-tipped blades. A circular saw or miter saw is useful for straight and angled cuts, while a jigsaw can handle more detailed shapes.
For clean results:
- Measure twice before cutting.
- Use a sharp, fine-tooth blade suitable for composite materials.
- Support the board properly to prevent vibration and uneven cuts.
- Wear safety glasses, gloves, and appropriate dust protection.
- Remove cutting debris from grooves before installing fastening clips.
After installation, complete the edges with compatible fascia boards, corner trims, or other manufacturer-approved accessories. Check that all exposed edges are properly supported and that drainage paths remain unobstructed.
5. WPC Wall Cladding Installation
WPC wall cladding requires a different supporting structure from horizontal decking. The wall surface must be structurally sound, and the installation system should provide adequate ventilation and moisture management.
Begin by checking the wall for uneven areas, moisture problems, and structural defects. Install the specified aluminum or galvanized steel battens, ensuring they are securely anchored to the supporting wall.
The installation process typically involves:
- Marking the batten positions according to the panel manufacturer’s specifications.
- Installing and leveling the supporting framework.
- Providing a suitable drainage and ventilation cavity.
- Fixing the first WPC cladding panel with the designated starting accessories.
- Connecting subsequent panels using the approved clips, screws, or interlocking system.
- Maintaining the required expansion clearances around openings, corners, and panel ends.
- Completing the installation with compatible corner profiles and finishing trims.
For exterior applications, ensure that the cladding system includes appropriate flashing, drainage details, and weather protection. WPC cladding should not be treated as a substitute for the building’s primary waterproofing system.
6. Inspection and Long-Term Maintenance
After installation, inspect the entire surface before handing over the project. Check board alignment, fastening security, expansion gaps, edge finishing, and drainage conditions. Pay particular attention to joints, perimeter areas, and locations exposed to frequent pedestrian traffic.
Although WPC products generally require less maintenance than traditional timber, regular cleaning remains important.
Recommended maintenance practices include:
- Remove leaves, dirt, and debris regularly to prevent moisture accumulation.
- Clean the surface using water and a mild detergent.
- Use a soft brush to remove stubborn dirt without damaging the surface.
- Avoid harsh chemicals and abrasive cleaning equipment unless approved by the manufacturer.
- Inspect fastening clips, perimeter trims, and supporting structures periodically.
- Check drainage channels and ventilation openings to ensure they remain clear.
For commercial and industrial facilities, establish a scheduled inspection and cleaning program based on actual site conditions and usage intensity.
A successful WPC flooring installation depends on more than selecting durable decking boards. Proper subframe preparation, compatible fastening systems, controlled expansion gaps, accurate cutting, and routine maintenance all contribute to a reliable finished surface. By following the product manufacturer’s technical requirements and adapting installation details to the project’s structural and environmental conditions, contractors can achieve durable, professional results across commercial outdoor flooring and exterior wall cladding applications.
Related Articles
 How To Complete Wood Plastic Decking Installation With Proper Methods And Tools
 How To Complete Wpc Deck Installation For Long Lasting Outdoor Flooring
 How To Install Wpc Wall Panel With A Complete Step By Step Guide
 decking composite calculator helps estimate material requirements and project costs for outdoor decking installation
Related Products
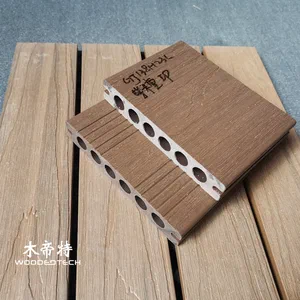 GD13823-3 Composite Boards for Decking Are Available in Multiple Stock Colors with 3 Meter Lengths and Single Piece Delivery
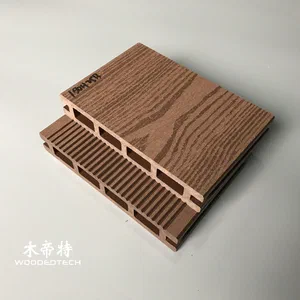 D15025-2 Classic Waterproof Insect Resistant Corrosion Resistant And Termite Resistant Composite Decking Types With Twenty Years Of Sales Experience
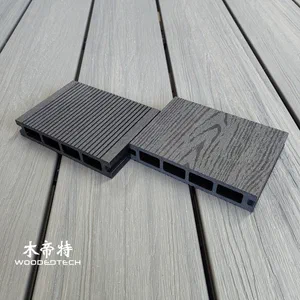 D14025-4 WPC Decking Boards Feature a Flat Wood Grain Surface with Black Ebony Heartwood Ring Grain for Outdoor Applications