
Optimizing Project Efficiency with Composite Decking Installation Tools
Efficient composite decking installation depends on selecting the right tools, preparing the subframe correctly, and following the manufacturer’s fixing and spacing requirements. A well-organized installation process reduces cutting errors, prevents alignment problems, and helps ensure a durable, professional finish for both WPC decking and exterior wall cladding.
1. Prepare the Tools and Materials Before Installation

Having the correct tools available before starting work helps avoid unnecessary interruptions and improves installation accuracy. Although WPC products are designed for straightforward installation, they require suitable cutting, measuring, drilling, and fastening equipment.
The essential tools for composite decking installation include:
- Measuring tape and chalk line for accurate layout and board positioning.
- Spirit level or laser level for checking surface alignment.
- Circular saw or mitre saw with a fine-tooth blade for clean cuts.
- Cordless drill and impact driver for pilot holes and screw installation.
- Rubber mallet for gently positioning boards and clips.
- Drill bits and countersink bits for preparing fixing points.
- Spacers and installation clips for maintaining consistent gaps.
- Safety glasses, gloves, hearing protection, and a dust mask.
For WPC wall cladding, additional equipment may include a longer level, wall plugs, suitable anchors, and tools for adjusting the supporting battens. Before work begins, check that the selected fasteners, clips, and accessories are compatible with the specific WPC product.
2. Inspect the Installation Area and Prepare the Subframe
A stable, level subframe is essential for achieving a long-lasting composite decking installation. Start by inspecting the ground or existing structural surface. Remove debris, vegetation, loose materials, and standing water.
For outdoor decking installed over concrete or prepared ground, ensure the foundation provides adequate drainage. The supporting structure must be stable and designed to carry the expected loads. Where required, incorporate a suitable slope to direct rainwater away from buildings.
Install the joists according to the decking manufacturer’s recommended spacing and structural requirements. Aluminum joists or treated timber supports may be suitable, depending on the project design and product specifications.
Check the following before fixing the boards:
- Joists are evenly spaced and securely anchored.
- The supporting structure is level and properly aligned.
- Adequate ventilation is available beneath the decking.
- Drainage routes remain unobstructed.
- Joist positions provide sufficient support at board ends and joints.
For WPC wall cladding, prepare a separate supporting batten framework. Check the wall condition, establish a suitable fixing system, and ensure the battens are aligned vertically or horizontally according to the cladding design. Maintain the ventilation cavity and drainage provisions required by the system.
3. Measure, Cut, and Position WPC Boards
Accurate measuring and cutting can significantly reduce material waste and installation time. Begin by measuring the installation area and preparing a board layout. Plan the direction of the decking, staggered joints, edge details, and finishing profiles before making any cuts.
Use a circular saw or mitre saw fitted with a suitable fine-tooth blade. Support the boards securely during cutting to prevent movement, uneven edges, or damage to the surface.
For better cutting accuracy:
- Measure each board individually rather than relying on repeated assumptions.
- Mark cutting lines clearly with a pencil or chalk.
- Check the required length before cutting.
- Keep cut ends square where boards meet or connect.
- Remove loose cutting debris before installation.
For wall cladding, check the panel orientation and decorative pattern before cutting. When working around windows, doors, corners, or external fixtures, measure openings carefully and leave appropriate movement clearances.
Always follow the manufacturer’s recommendations for cutting temperature, blade selection, and handling. Wear appropriate protective equipment and use dust extraction where practical.
4. Select the Correct Fixing Method
The fixing method depends on the WPC profile, supporting structure, and intended appearance. Using compatible accessories helps maintain board stability while allowing the material to expand and contract with temperature changes.
For grooved composite decking, hidden installation clips are commonly used. Position the starter clips along the first joist, install the initial board, and insert the intermediate clips into the grooves. Secure each clip to the joist using the specified screws. Continue placing boards and fastening clips row by row.
For solid-edge decking profiles, approved face-fixing screws may be required. Drill pilot holes where specified and position the screws consistently. Avoid overtightening, as excessive pressure may damage the board or restrict natural movement.
WPC wall cladding generally uses concealed clips, manufacturer-approved screws, or a dedicated fixing system. Start with the correct base or starter profile, check the first panel carefully, and continue fixing panels while maintaining consistent alignment.
Do not mix incompatible fasteners or substitute ordinary timber screws for system-approved accessories without checking their suitability.
5. Maintain Expansion Gaps and Accurate Alignment
WPC materials respond to temperature changes, so expansion gaps are an essential part of installation rather than an optional finishing detail.
Allow the recommended end-to-end gaps between boards, as well as clearance around walls, posts, drains, and other fixed structures. The required spacing depends on the board length, installation temperature, product formulation, and manufacturer’s specifications.
For efficient installation, use dedicated spacers or a measuring gauge to maintain consistent gaps throughout the project.
Pay particular attention to:
- Board-end joints and staggered connections.
- Clearances between decking and building walls.
- Expansion space around fixed posts and structural elements.
- Ventilation gaps beneath decking and behind wall cladding.
- Manufacturer-specified clearances at corners and panel edges.
Never force boards tightly together to create a seamless appearance. Insufficient expansion space can cause buckling, deformation, or unwanted pressure on the fixing system.
6. Complete Finishing Work and Inspect the Installation
Once the main boards are installed, complete the edges using compatible fascia boards, corner trims, starter profiles, or finishing accessories.
Check that all screws and clips are secure, board spacing is consistent, and exposed edges have been finished neatly. Walk across the completed deck to identify movement, uneven sections, or loose connections. For wall cladding, inspect panel alignment, corner joints, openings, and ventilation paths.
Remove installation debris and clean the surface according to the product manufacturer’s recommendations. Avoid aggressive cleaning chemicals or abrasive tools that may damage the protective surface.
A final inspection should confirm that the installation meets the project’s structural requirements, drainage provisions, and product-specific installation guidelines.
7. Maintenance Tips for Long-Term Performance
One advantage of WPC decking and wall cladding is their relatively low maintenance requirement. However, regular care helps preserve their appearance and service life.
Recommended maintenance practices include:
- Sweep away leaves, dust, and loose debris regularly.
- Wash the surface with water and a mild cleaning solution when necessary.
- Remove food, oil, and other stains promptly using approved cleaning methods.
- Keep drainage openings and ventilation spaces clear.
- Inspect clips, screws, joints, and finishing profiles periodically.
- Avoid dragging heavy furniture or sharp objects across the surface.
For commercial installations, establish a scheduled inspection routine to identify loose fixings, drainage problems, and surface damage before they become larger maintenance issues.
FAQ
Q: What is the most important tool for composite decking installation?
A: A suitable circular or mitre saw, cordless drill, measuring tape, and spirit level are among the most important tools. Installation clips and spacers are also essential for maintaining consistent fixing and expansion gaps.
Q: Can WPC decking be installed using ordinary wood screws?
A: Not all wood screws are suitable for WPC products. Use manufacturer-approved screws and compatible clips to ensure secure fixing without restricting material movement.
Q: How can installation time be reduced without compromising quality?
A: Prepare the subframe, tools, accessories, and board layout before installation. Using suitable cutting equipment, standardized spacers, and compatible hidden fixing systems can improve productivity while maintaining consistent results.
Related Articles
 DIY Composite Deck Allows Homeowners to Build Personalized Outdoor Living Spaces Easily
 Installing composite decking boards without clips: B2B Installation Guide
 Composite Decking Spacing Between Joists: Industry Standards and Best Practices
 Composite Decking Installation Tools: Industrial Buyer Guide 2026
Related Products
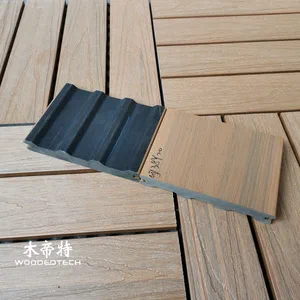 GD13820 M Shape Co Extruded Composite Deck Planks Feature a Special Profile Design for Distinctive Outdoor Decking Applications
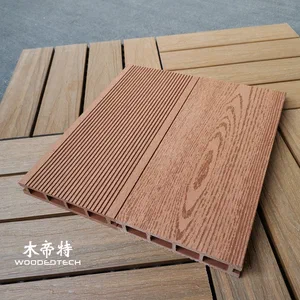 The Classic D14025-4 Red Wood WPC Wood Sheet Features a Timeless 2D Flat Wood Grain Design That Remains Popular After Twenty Years
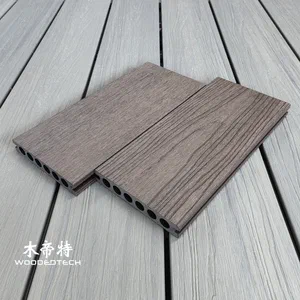 3DGD13823 Second Generation 3D Embossed Rosewood Composite Balcony Decking Delivers Ultra Realistic Wood Grain Texture and a Premium Natural Wood Experience