How To Install Wpc Fluted Panel
WPC fluted panels are widely used for interior wall cladding in commercial projects because they combine a decorative timber-like look with low maintenance and stable performance. Installing them correctly is essential for a clean finish, long service life, and fewer on-site issues. This guide explains the installation process for contractors, distributors, and project teams working on industrial and B2B fit-out jobs.
What a WPC Fluted Panel Is
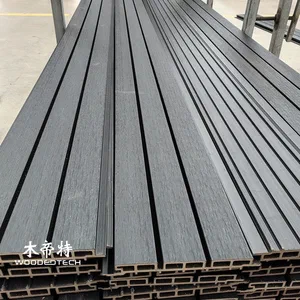
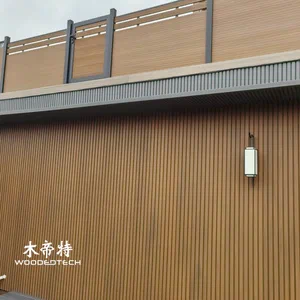
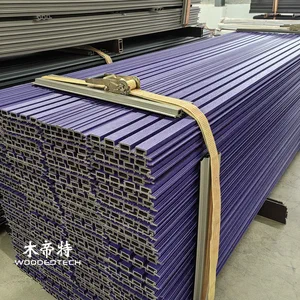
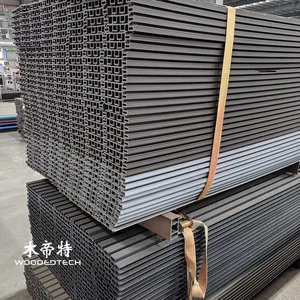
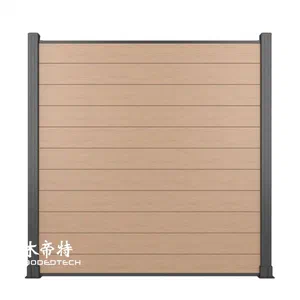
A WPC fluted panel is a wall panel made from wood-plastic composite, typically engineered from wood fiber, polymer materials, and performance additives. The fluted profile creates a linear decorative effect that works well in offices, retail spaces, hospitality interiors, showrooms, and public buildings.
Compared with solid wood, WPC panels are generally more stable in changing indoor environments and easier to maintain. They are also chosen for their consistent appearance, fast installation, and compatibility with modern interior design systems.
Before You Start Installation
Proper preparation reduces installation errors and helps the finished wall look uniform. Before beginning, confirm the following points:
- Panels are delivered in good condition and stored flat in a dry area
- The wall surface is clean, level, and free from loose dust or oil
- The panel type, color, and batch numbers match the project requirements
- The installation method is agreed in advance: adhesive, clips, or screws
- Expansion gaps, trim details, and edge finishes are included in the work plan
For large commercial projects, it is also important to acclimate the panels to the jobsite environment before installation. Keep them in the room where they will be installed for several hours or according to supplier guidance, especially when temperature and humidity differ from storage conditions.
Tools and Materials Needed

- Measuring tape
- Spirit level or laser level
- Pencil or chalk line
- Fine-tooth saw or power saw
- Drill and fixing accessories
- Construction adhesive if required
- Screws, clips, or mounting battens
- Cleaning cloth
- Sealant or trim profiles for finishing edges
The exact fixing system depends on the panel specification and the wall substrate. Always follow the supplier’s technical instructions for compatible fasteners and adhesive types.
Step 1: Measure the Wall Area
Accurate measurement is the foundation of a clean installation. Measure wall height, wall width, openings, corners, and any special features such as sockets, columns, or built-in fixtures.
It helps to create a layout drawing before cutting any panels. For fluted panels, alignment matters because the linear grooves create a strong visual pattern. If the wall contains multiple sections, plan the panel joints so they look balanced rather than random.
For projects with repeated rooms or large quantities, standardizing the layout saves time and reduces waste.
Step 2: Prepare the Substrate
WPC fluted panels should be installed on a stable and suitable surface. The wall must be dry, flat, and structurally sound. If the substrate is uneven, use battens or leveling compound to create a suitable fixing base.
Common substrate types include:
- Masonry walls
- Gypsum board partitions
- Plywood or timber backing
- Metal framing systems with approved backing boards
If the wall is damp, dusty, or poorly aligned, the final result may be affected. Uneven substrates can cause visible gaps, poor adhesion, or panel distortion over time. In commercial projects, this step is often where most installation quality issues begin.
Step 3: Mark the Reference Line
Use a level or laser to mark a straight reference line on the wall. This line guides the first panel and ensures the entire run stays aligned.
Start from one corner or a clearly visible edge, depending on the room layout. If the first panel is not perfectly straight, every following panel will carry the same error. On long walls, check alignment repeatedly as the work progresses.
For projects with a ceiling cove, skirting, or feature lighting, the reference line should also respect the final visible boundaries.
Step 4: Cut the Panels to Size
Cut panels carefully based on the measured layout. Use a fine-tooth blade to reduce chipping and maintain a neat edge. When cutting around sockets, switches, or fixed items, mark the opening clearly before cutting.
A few practical points improve cutting quality:
- Cut from the back side if it helps reduce visible edge damage
- Support the panel properly to avoid vibration
- Check each cut against the wall before final fixing
- Keep offcuts for use around edges or smaller sections
For large projects, batch cutting can improve efficiency, but every cut should still be checked against the actual wall before installation.
Step 5: Install the First Panel
The first panel determines the accuracy of the entire wall. Position it along the reference line and confirm it is vertical and correctly spaced from adjacent surfaces.
Depending on the system, you may use:
- Construction adhesive on a prepared backing wall
- Hidden clips fixed to battens or substrate
- Screws in designated fixing zones
- A combination of adhesive and mechanical fixing
Press the panel firmly into place and hold it long enough for the fixing method to set. If screws or clips are used, make sure they are hidden or positioned according to the panel design so the surface remains clean.
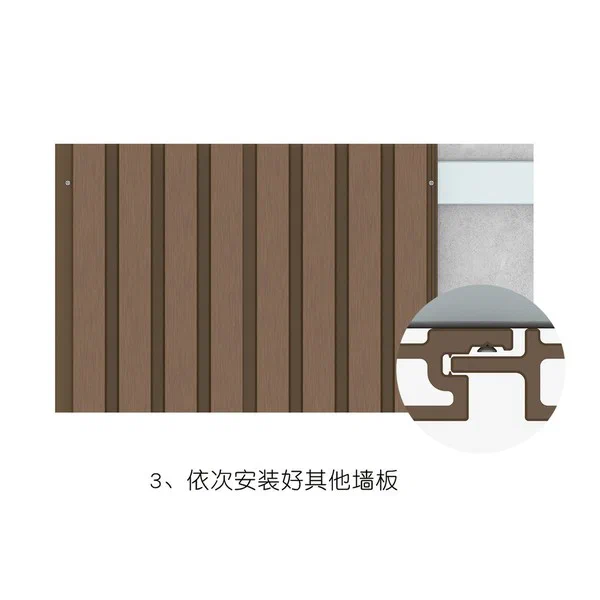
Step 6: Continue Panel by Panel
Install the next panels one by one, checking alignment as you go. Most WPC fluted panels are designed with tongue-and-groove, interlocking edges, or concealed joining systems that help create a continuous look.
Keep the following details under control:
- Groove alignment must remain consistent
- Joints should be tight but not forced
- Expansion gaps should be left where required
- Repeated checks should be made with a level
- Panel face direction should remain consistent across the wall
If the project uses multiple walls in the same room, maintain the same orientation and spacing so the interior looks uniform.
Step 7: Handle Corners, Edges, and Openings
Corners and termination points define the quality of the finished job. Use trims, end caps, or finishing strips if specified by the product system. These details protect exposed edges and improve the visual transition between surfaces.
Around switches, outlets, and fixtures, cut carefully and leave enough clearance for safe installation. The edge should look intentional, not patched. In commercial spaces, neat detailing matters because these areas are close to the eye line and are often reviewed during handover.
If the panel system requires expansion space at the perimeter, do not fill that gap too tightly. WPC materials can move slightly with temperature changes, so edge allowance helps maintain long-term stability.
Step 8: Final Inspection and Cleaning
Once the panels are installed, inspect the wall from several angles and under normal lighting. Look for:
- Misalignment or uneven spacing
- Loose fixing points
- Visible adhesive marks
- Damaged grooves or surface scratches
- Unfinished edge details
Clean the surface with a soft cloth and remove dust or installation residue. Avoid harsh chemicals unless the supplier confirms they are safe for the panel finish. For handover-ready commercial projects, a clean final surface is as important as the installation itself.
Common Installation Mistakes to Avoid
Many site issues can be prevented with basic control measures. The most common mistakes include:
- Installing on an uneven or damp wall
- Skipping layout planning before the first panel
- Using incompatible adhesive or fasteners
- Cutting too quickly and damaging the panel edge
- Ignoring expansion allowance at perimeter areas
- Failing to check alignment after several rows
These mistakes can reduce the appearance, performance, and client satisfaction of the finished project. For B2B buyers and contractors, consistency and speed matter, but quality control matters more.
Why Proper Installation Matters for B2B Projects
In commercial interiors, panel performance is only part of the value. Installation quality affects project delivery, maintenance demand, and the client’s impression of workmanship. A well-installed WPC fluted panel wall can support faster project turnover, fewer after-sales complaints, and a stronger product presentation for distributors and contractors.
When installation is standardized across multiple sites, it also makes procurement and labor planning more predictable. That is one reason WPC fluted panels are popular in large-scale interior fit-outs.
FAQ
Q: Can WPC fluted panels be installed directly on a wall? A: Yes, if the wall is flat, dry, and suitable for the chosen fixing method. Uneven or weak substrates may need battens or backing boards.
Q: Do WPC fluted panels need expansion gaps? A: In many cases, yes. Small perimeter gaps help accommodate material movement and prevent stress on the installation.
Q: What is the best fixing method for commercial projects? A: It depends on the panel system and substrate. Common options include adhesive, hidden clips, screws, or a combination of methods.
Q: Can WPC fluted panels be cut on site? A: Yes, they can usually be cut on site with a fine-tooth saw or suitable power tool. Clean marking and careful cutting are important.
Q: Are WPC fluted panels suitable for high-traffic interiors? A: Yes, they are commonly used in commercial interiors such as offices, retail areas, and hospitality spaces when installed correctly.