How To Install Wpc Fluted Panel Outdoor
Installing WPC fluted panel outdoor products correctly is essential for long-term performance, clean aesthetics, and lower maintenance on commercial and architectural projects. For B2B buyers, contractors, and project teams, the installation method matters as much as the product itself because improper fixing can lead to movement, warping, water ingress, and uneven finishes.
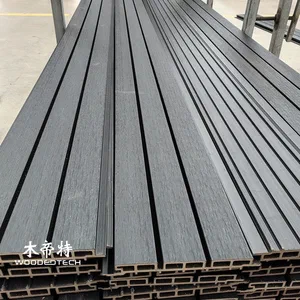
What WPC Fluted Panel Outdoor Is
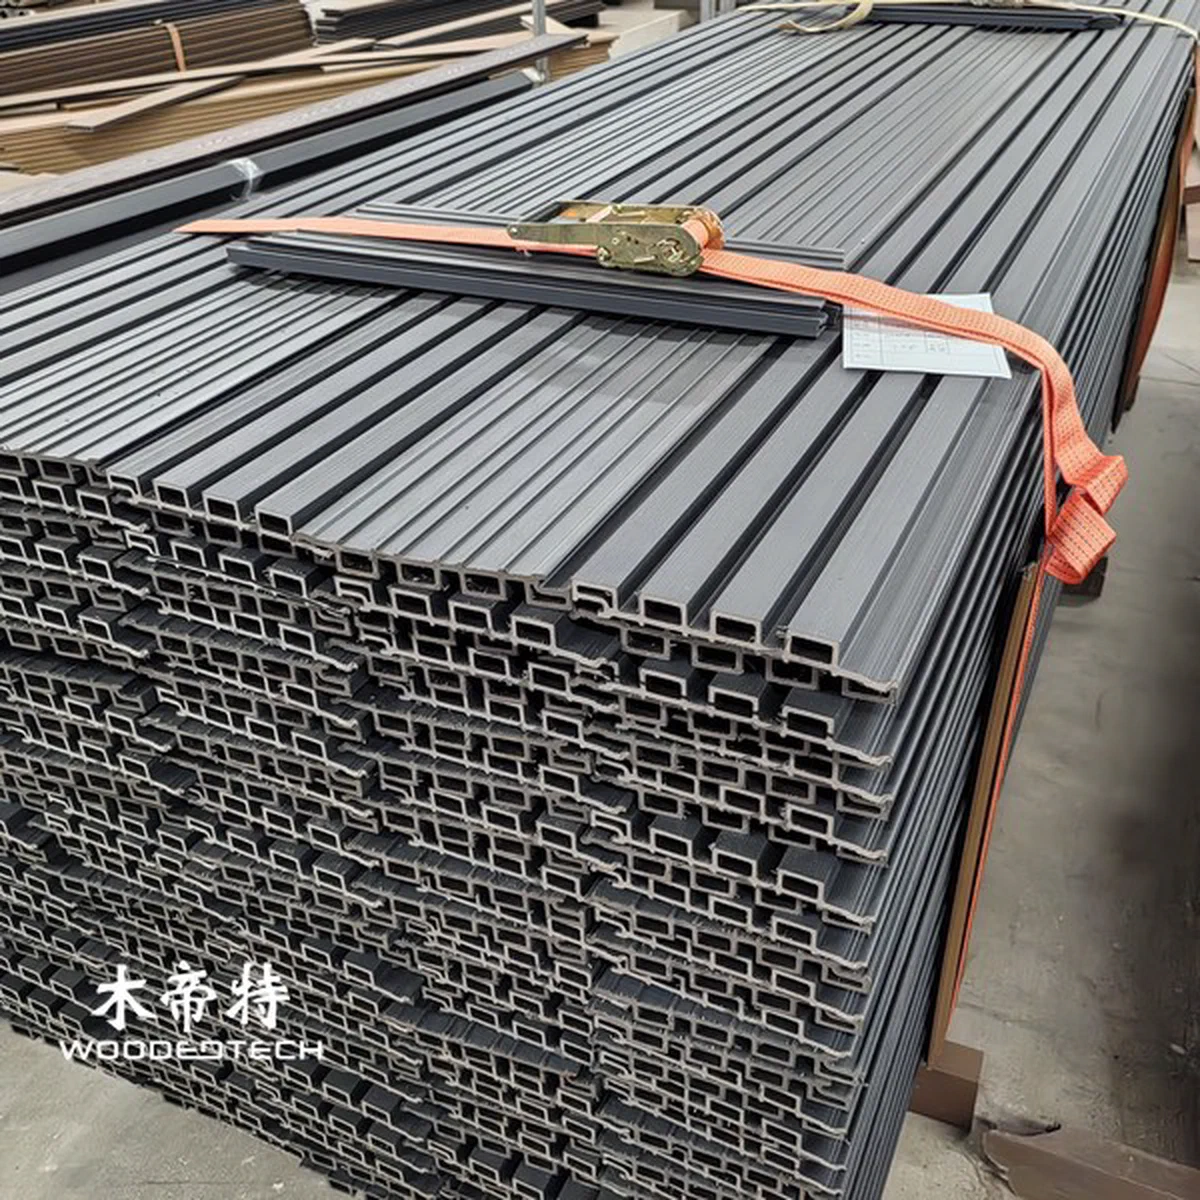
WPC fluted panel outdoor is a wood-plastic composite cladding panel designed for exterior applications. It combines the look of timber with better resistance to moisture, insects, and weather exposure, making it suitable for facades, entry walls, commercial buildings, outdoor feature walls, and landscape structures.
Compared with natural wood, WPC panels generally offer more stable dimensions and lower upkeep. That makes them attractive for developers, contractors, and distributors looking for a durable exterior finish with strong visual appeal.
Pre-Installation Planning
A successful installation starts before the first panel is fixed. Site conditions, substrate quality, and expansion requirements should all be checked in advance.
Before installation, confirm the following:
- The wall structure is sound, level, and dry
- The subframe material is suitable for exterior use
- Drainage and ventilation behind the cladding are properly designed
- Panel quantity, length, and color batches are matched
- Local building codes and fire requirements have been reviewed
Outdoor WPC panels expand and contract slightly with temperature changes. Leave proper gaps and use the manufacturer’s recommended fixing system to avoid stress on the material.

Tools and Materials You Need
Most projects use standard carpentry and cladding tools. Having everything ready improves installation speed and consistency.
Common tools and materials include:
- Measuring tape, chalk line, and spirit level
- Saw with fine-tooth blade for clean cuts
- Drill and stainless-steel screws
- Subframe battens or metal furring channels
- Clips, fasteners, or hidden fixing accessories if specified
- Spacer blocks for uniform gaps
- Sealant or trim accessories where required
For outdoor use, stainless-steel or corrosion-resistant fasteners are strongly recommended. Standard steel hardware can rust over time and stain the panel surface.
Prepare the Substructure
The substructure is the foundation of the installation. If the frame is uneven or weak, the final cladding will not look straight and may fail prematurely.
The most common substructure options are treated timber battens or aluminum/metal framing. Both can work well if they are fixed securely and installed at the correct spacing. The surface should be flat and aligned, with enough support for the panel width and expected wind load.
Important preparation steps:
- Ensure the frame is plumb and level
- Use correct spacing between battens or channels
- Allow ventilation behind the panels
- Avoid direct contact with wet surfaces or standing water
- Add waterproof membrane if the wall assembly requires it
Good airflow behind the cladding helps reduce moisture buildup and improves durability.
Acclimate the Panels
WPC fluted panel outdoor products should be stored in a clean, dry area before installation. If possible, let the panels acclimate to the site environment for a short period before fixing them.
Keep the panels:
- Flat and supported
- Away from direct sunlight during storage
- Protected from rain, dust, and impact
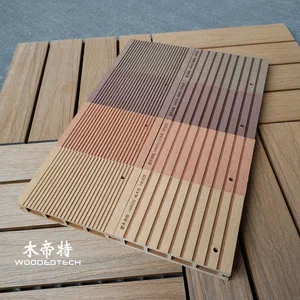
- Organized by color and length
This helps minimize distortion and makes installation smoother, especially on large projects where appearance consistency is important.
Mark the Layout First
Accurate layout work saves time and reduces waste. Start by measuring the full wall area and planning the panel direction before cutting anything.
Decide whether the flutes will run vertically or horizontally. Vertical installation is common for modern facades because it creates a taller visual effect and can help guide water downward. Horizontal installation is also used in some commercial designs for a broader architectural look.
When laying out the wall:
- Start from a reference line, not just the edge of the wall
- Check the first row carefully, since all following rows depend on it
- Plan for trims, corners, and openings around doors or windows
- Balance the visual composition so narrow cut strips are avoided where possible
On large exterior walls, even a small alignment error at the bottom can become obvious at the top.
Cut the Panels Correctly
Cutting should be done with care to avoid rough edges and surface damage. Use a fine-tooth blade designed for composite materials, and support the panel fully while cutting.
Best practices for cutting:
- Measure twice before cutting
- Keep cut edges clean and square
- Remove dust and debris after cutting
- Follow safety rules for eye, hand, and respiratory protection
If the project includes custom corners, outlets, or façade details, pre-cutting the panels may improve installation speed. However, always verify measurements on site first.
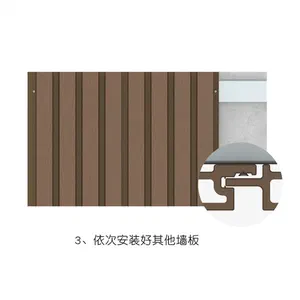
Fix the Panels to the Frame
The exact fixing method depends on the panel design, but the general principle is the same: secure the panel without over-tightening or restricting natural movement.
Common fixing methods include:
- Hidden clips or concealed fasteners
- Face fixing with corrosion-resistant screws
- Tongue-and-groove interlocking systems, where applicable
When fastening WPC fluted panels:
- Do not overdrive screws
- Keep fixings aligned for a neat finish
- Use the manufacturer’s recommended fixing points
- Leave expansion gaps between panels and at edges
- Do not force panels tightly against trim or corners
If hidden fixing is available, it is often preferred for premium commercial work because it gives a cleaner surface and reduces visible hardware.
Pay Attention to Joints and Corners
The joint details often determine whether the project looks professional. Clean transitions are especially important on exterior walls, entrance zones, and retail façades.
Use matching trim profiles or approved finishing accessories for:
- External corners
- Internal corners
- Top and bottom edges
- Window and door openings
- Wall termination points
Joints should allow movement while still maintaining a sharp architectural appearance. Never seal panels in a way that traps moisture without a proper design allowance.
Finish and Inspect the Installation
Once the panels are installed, inspect the entire surface carefully. Check for alignment, uniform spacing, secure fixings, and clean edges.
Final inspection should confirm:
- Panels are level and consistent
- All fasteners are properly seated
- Expansion gaps are maintained
- Trim pieces are fitted securely
- There are no visible cracks, dents, or installation marks
A clean final check helps reduce after-sales claims, especially on commercial projects where appearance and durability are both critical.
Maintenance After Installation
One of the main advantages of WPC fluted panel outdoor products is low maintenance. Still, exterior surfaces should be cleaned periodically to remove dust, pollution, and weather residue.
Recommended care includes:
- Washing with mild soap and water
- Avoiding harsh solvents or abrasive pads
- Inspecting fasteners and trims during routine building maintenance
- Clearing debris from drainage zones and lower edges
For distributors and project owners, low-maintenance performance is one of the strongest selling points of WPC cladding. Proper installation is what makes that benefit reliable over time.
Common Installation Mistakes to Avoid
Many exterior cladding problems come from simple errors during installation. These issues are avoidable with planning and correct fixing methods.
Watch out for these mistakes:
- Installing on an uneven frame
- Ignoring expansion gaps
- Using non-corrosion-resistant screws
- Skipping ventilation behind the cladding
- Cutting panels with the wrong blade
- Over-tightening fixings
- Failing to check alignment after each row
Avoiding these problems improves the final appearance and extends service life.
Choosing the Right Supplier Matters
For B2B buyers, product quality and installation support should be part of the sourcing decision. A reliable supplier can provide consistent panel dimensions, matching accessories, technical guidance, and packaging that protects goods during transit.
When evaluating a supplier, ask about:
- Material composition and UV resistance
- Recommended installation system
- Color consistency across batches
- Custom lengths or profiles
- Warranty and technical documentation
A well-made panel is easier to install, performs better outdoors, and creates fewer site issues.
FAQ
Q: Can WPC fluted panel outdoor be installed directly on a wall? A: It is better to install it on a proper subframe with ventilation rather than fixing it directly to the wall surface.
Q: Does WPC fluted panel outdoor need expansion gaps? A: Yes, expansion gaps are important because the material can expand and contract with temperature changes.
Q: Which fasteners should be used for outdoor WPC panels? A: Stainless-steel or other corrosion-resistant fasteners are recommended for exterior applications.
Q: Can WPC fluted panel outdoor be used on commercial buildings? A: Yes, it is widely used for commercial facades, feature walls, and exterior architectural finishes.
Q: How do you clean WPC fluted panel outdoor surfaces? A: Use mild soap, water, and a soft cloth or brush, then rinse thoroughly.