How To Install Wpc Fluted Panel On Wall
Installing a WPC fluted panel on a wall is a practical way to upgrade commercial interiors with a durable, low-maintenance surface and a refined linear texture. For contractors, distributors, and project specifiers, the key is to prepare the substrate correctly, choose the right fixing method, and install each panel with consistent alignment.
What WPC Fluted Panels Are
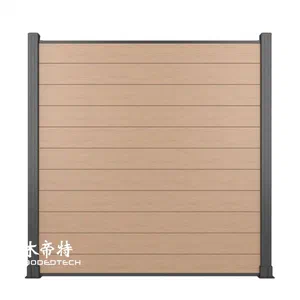
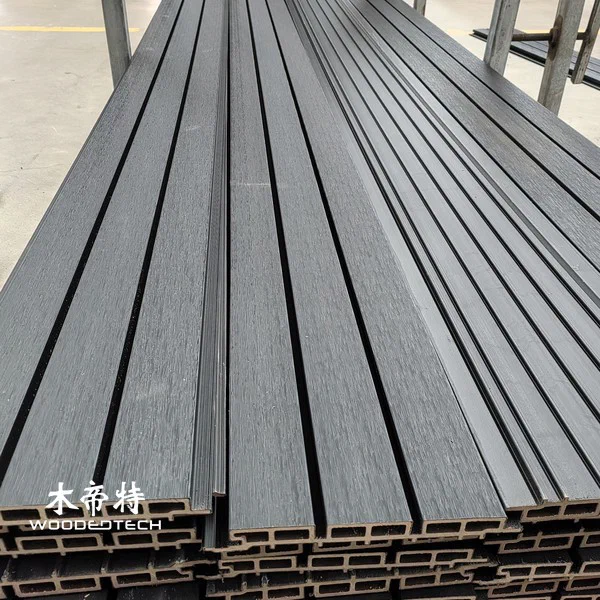
WPC fluted panels are decorative wall panels made from wood-plastic composite materials. They combine the appearance of timber with the stability and moisture resistance of polymer-based construction, making them suitable for retail spaces, offices, hospitality interiors, showrooms, and other high-traffic environments.
Their fluted profile creates depth and shadow lines, which can improve visual interest without requiring complex finishing work. Compared with natural wood, WPC panels are generally easier to maintain and less prone to warping, cracking, or insect damage.
Before You Start
Successful installation depends on preparation. Before fixing any panel, confirm that the wall is dry, flat, clean, and structurally sound. Uneven surfaces can create visible waves in the finished wall and reduce adhesion or fastener performance.
You should also check:
- Panel dimensions and batch consistency
- Required trim pieces, corner profiles, and end caps
- Wall layout and starting point
- Indoor temperature and humidity conditions
- The recommended fixing method from the supplier
If the project involves a large commercial area, sort panels before installation so color and grain variation are distributed evenly across the wall.

Tools and Materials
The exact installation method may vary by product, but most projects require the following:
- WPC fluted panels
- Measuring tape
- Laser level or chalk line
- Pencil or marking tool
- Saw or cutting tool suitable for composite materials
- Adhesive recommended for wall panels
- Fasteners, clips, or screws if specified
- Spacer blocks
- Sealant or finishing trims where needed
- Cleaning cloth
Using the correct adhesive and fasteners is important. Not all construction adhesives are suitable for WPC, and incompatible products may reduce bonding strength over time.
Step 1: Prepare the Wall
Start by inspecting the wall for dust, grease, loose paint, moisture, or cracked plaster. Repair defects before installation. If the wall surface is highly porous, very smooth, or unstable, a primer or backing board may be necessary to improve adhesion.
For commercial jobs, it is often best to install WPC fluted panels over a level substrate such as plywood, gypsum board, or battens. This gives a cleaner finish and simplifies alignment.
Also confirm that electrical outlets, switches, and concealed services are planned in advance. Once the panels are fixed, access becomes more difficult.
Step 2: Measure and Plan the Layout
Accurate layout work reduces waste and improves the final appearance. Measure the wall height and width, then calculate how the panels will fall across the surface. Determine whether the panels will run vertically or horizontally based on the design brief.
When planning the layout:
- Center the design when symmetry matters
- Avoid narrow slivers at corners if possible
- Mark the starting line with a level
- Allow for edge trims and expansion gaps
- Check how panels align around doors, columns, and fixtures
If the wall is highly visible, dry-fit a few panels first to verify the appearance before permanent fixing.
Step 3: Cut the Panels to Size
Cut panels carefully to avoid chipping or rough edges. A fine-tooth blade is usually better for clean cuts on composite materials. Always measure twice before cutting, especially when working around outlets, openings, or irregular wall edges.
For best results:
- Cut from the rear or less visible side when possible
- Support the panel during cutting
- Deburr the edges if needed
- Label trimmed panels to avoid confusion during installation
Consistency matters in B2B projects, particularly when multiple installers are working on the same site.
Step 4: Install the First Panel Correctly
The first panel determines the alignment of the entire wall. Use a level to make sure it is perfectly vertical or horizontal, depending on the design. Even a small error at the starting point can become very noticeable over a long run.
Fix the first panel using the approved adhesive, mechanical fasteners, or a combination of both. Apply adhesive in uniform beads or as recommended by the supplier. If the system uses clips or screws, position them according to the installation guide so the panel remains secure without visible distortion.
Leave a small expansion gap at the floor, ceiling, and side edges if specified by the manufacturer. WPC products can expand and contract slightly with temperature changes.
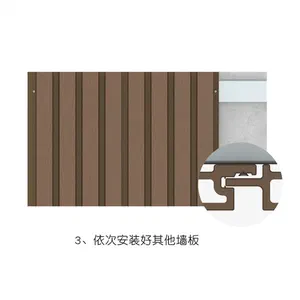
Step 5: Continue Panel by Panel
Once the first panel is secure, continue installing the remaining panels one by one. Maintain even spacing and keep checking alignment as you go. This is especially important with fluted patterns, because any offset will stand out clearly across the wall.
During installation:
- Press each panel firmly into place
- Check for level and plumb regularly
- Clean excess adhesive before it cures
- Use spacers if the system requires consistent gaps
- Avoid forcing panels into position
If tongue-and-groove or interlocking edges are part of the system, make sure each connection is fully seated. Gaps between panels can affect both appearance and performance.
Step 6: Finish Edges and Corners
A professional finish depends on clean edge treatment. Use trims, corner profiles, or matching end caps where needed to conceal raw edges and create a neat transition. Around outlets, switches, and openings, cut carefully and fit the panel flush to the accessory frame.
For commercial interiors, edge details are often the difference between a standard installation and a premium result. Take time to make sure all visible terminations are straight, even, and consistent with the project design.
Step 7: Inspect and Clean the Surface
After installation, inspect the wall for alignment, loose sections, adhesive marks, and visible gaps. Check that all panels are firmly fixed and that trims are secure.
Then clean the surface with a soft cloth and a mild cleaner if necessary. Avoid harsh solvents or abrasive pads, which may damage the finish. If the panels are being installed in a retail or hospitality space, make sure the area is fully cleaned before handover.
Common Installation Mistakes to Avoid
Even with a simple system, several mistakes can affect the final result:
- Installing over a wet or uneven wall
- Skipping layout measurements
- Starting with a crooked first panel
- Using the wrong adhesive
- Ignoring expansion gaps
- Rushing cuts around outlets and corners
- Leaving visible adhesive residue
Avoiding these problems improves both the visual result and the long-term reliability of the installation.
Best Practices for B2B Projects
For contractors and project buyers, installation efficiency matters as much as appearance. To reduce delays and rework, confirm the panel specification in advance, review the site conditions before delivery, and make sure all accessories arrive together.
It also helps to:
- Coordinate with electricians and finishing teams early
- Train installers on the specific panel system
- Keep spare panels for future repairs or replacements
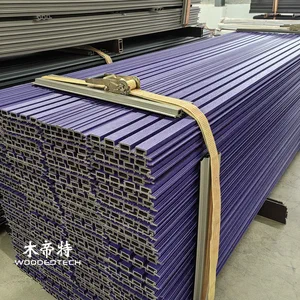
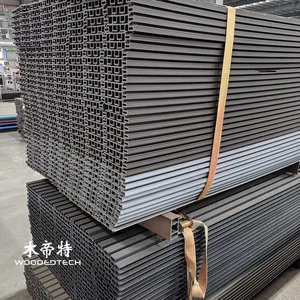
- Store materials flat and protected before use
- Follow the manufacturer’s installation instructions exactly
These steps reduce site risk and improve consistency across multiple projects.
FAQ
Q: Can WPC fluted panels be installed directly on a painted wall? A: Yes, if the wall is stable, clean, dry, and properly prepared. Glossy or weak paint should be sanded or treated first.
Q: Do WPC fluted panels need expansion gaps? A: In many cases, yes. Small expansion gaps help accommodate thermal movement and prevent pressure-related issues.
Q: What is the best fixing method for WPC fluted panels? A: It depends on the product and substrate. Adhesive, clips, screws, or a combination may be used according to the manufacturer’s system.
Q: Are WPC fluted panels suitable for commercial interiors? A: Yes. They are widely used in offices, retail stores, hospitality areas, and other interior spaces where durability and appearance matter.
Q: Can panels be installed vertically and horizontally? A: Yes, depending on the design intent and product specification. Layout should be planned before cutting or fixing begins.