
Grooved Composite Decking Installation: Best Practices for Industrial Projects
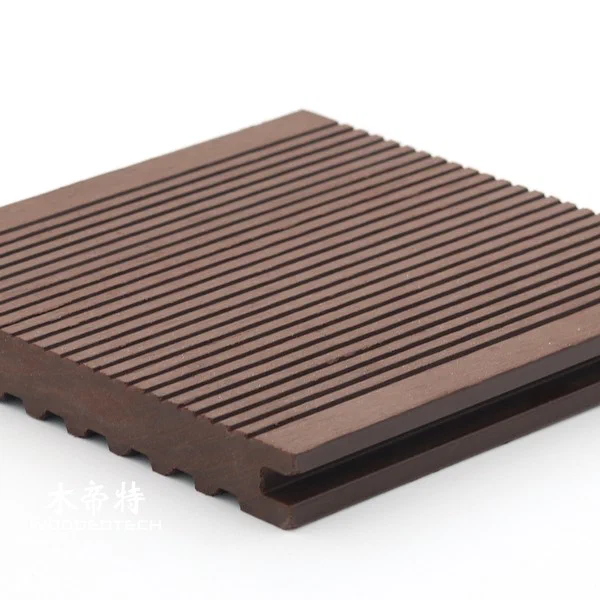
Grooved composite decking is a practical flooring solution for industrial projects that require durability, consistent appearance, and manageable maintenance. A reliable installation depends on proper subframe preparation, accurate board spacing, suitable hidden fasteners, and allowance for temperature-related expansion. The following guide covers the essential installation practices for achieving a stable, long-lasting WPC decking surface.
1. Prepare the Installation Area and Materials
Before installation begins, inspect the site conditions, drainage system, and supporting structure. Industrial projects often involve large outdoor platforms, walkways, loading areas, commercial terraces, and public spaces, so the subframe must be designed to withstand the expected loads and environmental conditions.
Start by checking that the ground is stable and that rainwater can drain away from the decking. For ground-level installations, prepare a compacted base with an appropriate drainage layer. For elevated installations, verify that the supporting structure meets the project’s engineering requirements.
Allow the WPC boards to acclimatize at the installation site according to the manufacturer’s instructions. Store them on a flat, level surface with adequate ventilation, avoiding direct contact with standing water.
Prepare the following tools and materials:
- Grooved WPC decking boards
- Compatible composite or aluminum joists
- Stainless steel starter clips and hidden fasteners
- Approved screws and expansion accessories
- Measuring tape, chalk line, and spirit level
- Circular saw or suitable cutting equipment
- Drill and driver with adjustable torque
- Protective gloves, safety glasses, and dust mask
Check that all boards, clips, and accessories are compatible with the selected decking profile. Mixing fastening systems from different manufacturers can cause alignment problems and unreliable connections.
2. Install and Level the Subframe
The subframe is the foundation of a successful wood plastic composite decking installation. Even high-quality decking boards can develop movement, uneven surfaces, or drainage problems when installed over an improperly prepared support structure.
Position the joists perpendicular to the intended decking board direction. Maintain the joist spacing specified by the decking manufacturer and the project’s structural requirements. For many standard residential-style composite systems, spacing may be around 300–400 mm, but industrial applications, heavier loads, and diagonal layouts may require closer support.
Secure the joists to the concrete foundation, steel framework, or prepared support system using suitable anchors and corrosion-resistant hardware. Check the alignment carefully before fixing the boards.
Important subframe requirements include:
- Maintain a consistent joist height across the installation area.
- Provide a suitable slope for surface water drainage.
- Keep adequate ventilation beneath the decking.
- Install additional support beneath board ends and joints.
- Ensure that the subframe material is suitable for outdoor exposure.
- Avoid joist movement caused by inadequate anchoring.
For large industrial platforms, expansion and movement within the supporting structure should also be considered during the design stage.
3. Fix Grooved Composite Decking Boards
Grooved composite decking is designed to accommodate hidden fastening systems, creating a clean surface without visible screw heads across the main walking area.
Begin by installing starter clips along the outer edge of the subframe. Position the first decking board with its groove aligned to the clips, then secure it according to the fastening system’s instructions.
Insert compatible hidden clips into the exposed groove along each supported joist. Tighten the screws without overtightening, allowing the fastening system to hold the board securely while accommodating normal material movement.
Continue installing the remaining boards one by one:
- Position the next board parallel to the previous board.
- Insert the hidden clips into the exposed groove.
- Check the board alignment and spacing.
- Tighten the fasteners at each joist intersection.
- Repeat until the decking area is covered.
- Install suitable finishing clips or approved edge fasteners along the final row.
For industrial projects, regularly check the installation line with a string line or laser level. Small alignment errors can become more noticeable across large decking surfaces.
Where board ends meet, ensure that both ends have independent support. Use the manufacturer’s approved joining method rather than relying on a single fastener to secure two unsupported board ends.
4. Maintain Expansion Gaps and Cutting Accuracy
WPC decking expands and contracts with changes in temperature. Although composite materials are dimensionally stable compared with many natural timber products, they still require appropriate clearance during installation.
Follow the manufacturer’s recommended expansion gaps for the specific board profile, installation temperature, board length, and fastening system. Do not apply one universal spacing measurement to every project.
Pay particular attention to these areas:
- Side-to-side gaps between adjacent decking boards.
- End-to-end gaps where two boards meet.
- Clearance between decking and walls, columns, or fixed structures.
- Perimeter gaps around drainage channels and other obstructions.
For cutting, use a sharp carbide-tipped saw blade suitable for composite materials. Measure each board carefully before cutting and support it securely to prevent vibration or edge damage.
Make straight, clean cuts wherever possible. Remove loose material and inspect the cut edges before installation. For visible deck edges, use compatible fascia boards or finishing profiles to achieve a neat appearance while maintaining the required ventilation.

Avoid forcing boards into position or using excessive screw pressure to close gaps. These practices can restrict thermal movement and contribute to surface distortion over time.
5. Install WPC Wall Cladding and Transition Details
When an industrial project includes both decking and exterior wall cladding, the two systems should be installed with compatible but independent supporting structures.
For outdoor WPC wall cladding, first inspect the wall substrate and install a suitable batten or metal support framework. Check that the structure is straight, securely anchored, and designed to provide drainage and ventilation behind the panels.
Install the first cladding panel according to the manufacturer’s starting profile and fixing instructions. Continue attaching subsequent panels using the specified clips, screws, or interlocking connections.
Important installation considerations include:
- Maintain the recommended ventilation cavity behind the panels.
- Allow expansion clearance around corners, openings, and panel ends.
- Use corrosion-resistant fasteners suitable for exterior exposure.
- Provide appropriate flashing and drainage details.
- Avoid blocking ventilation openings with sealant or finishing materials.
- Use compatible corner trims and edge profiles.
At the transition between decking and wall cladding, leave sufficient clearance to prevent trapped moisture and allow independent movement. Do not rigidly connect the two systems unless the manufacturer’s approved design specifically requires it.
6. Inspect the Finished Installation and Establish Maintenance Procedures
After installation, inspect the entire decking surface before opening the area for use. Check that all boards are properly seated, hidden clips are secure, and expansion gaps remain consistent.
For industrial applications, additional attention should be given to load-bearing areas, access routes, drainage points, and transitions around machinery or fixed structures. Confirm that the completed installation meets the project’s applicable structural, fire, slip-resistance, and accessibility requirements.
WPC decking generally requires less maintenance than traditional timber, but regular cleaning helps preserve its appearance and performance.
Recommended maintenance practices include:
- Sweep away dust, leaves, and loose debris regularly.
- Wash the surface with water and a mild detergent when necessary.
- Remove oil, grease, and other industrial contaminants promptly using manufacturer-approved cleaning products.
- Keep drainage channels clear to prevent standing water.
- Inspect fasteners, board joints, and perimeter details periodically.
- Replace damaged boards using the approved fastening procedure.
Avoid aggressive abrasive cleaning methods or chemical products that may damage the decking surface. For industrial facilities exposed to heavy equipment, chemicals, or frequent cleaning, establish a maintenance schedule based on actual operating conditions.
A well-installed grooved composite decking system starts with a properly engineered subframe and continues with accurate fastening, controlled expansion gaps, and consistent quality checks. For large commercial and industrial projects, following the decking manufacturer’s installation specifications at every stage helps reduce installation defects, improve long-term stability, and deliver a durable outdoor surface with predictable maintenance requirements.
Related Articles
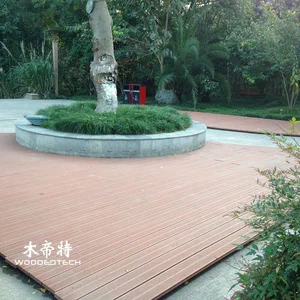
Related Products
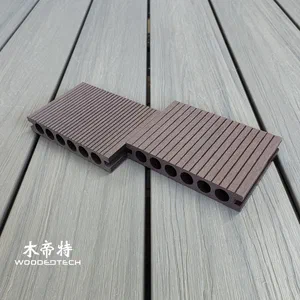 The D14025-6 Composite Decking 2 x 4 Features a Practical Walnut Design with Double-Sided Large and Small Grooves for Versatile Outdoor Applications
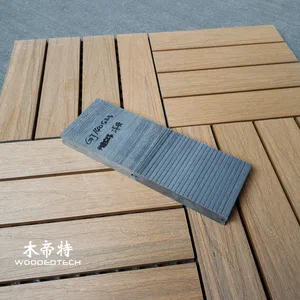 GD14023S Composite Deck Materials Feature a Solid Structure and Side Grooves for Better Adaptability in Extremely Cold Climates
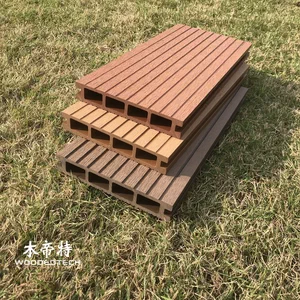 D14025-3 Square Hole Double Sided Grooved WPC Board Factory Producing Outdoor Decking Boards With Good Slip Resistance