Facade Composite Panels: Installation Best Practices and Common Mistakes

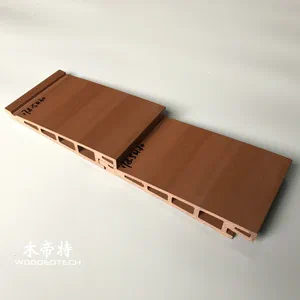
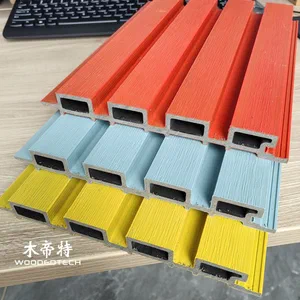
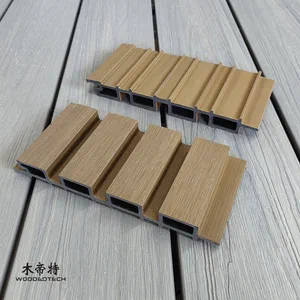
Facade composite panels provide a durable, low-maintenance solution for exterior walls when installed with the correct subframe, fixing system, and expansion allowances. Proper installation of WPC facade panels helps prevent panel movement, surface deformation, water-related damage, and premature wear while maintaining a clean, consistent appearance.
1. Prepare the Wall Surface and Check Site Conditions
Before installing any facade composite panels, inspect the existing wall structure. The substrate must be sufficiently strong to support the subframe and panel system. Remove loose materials, dust, protruding mortar, and other obstructions that could affect alignment or fixing strength.
Check the wall for moisture problems, cracks, and uneven areas. Any structural defects or water ingress should be addressed before installation. Although WPC cladding offers good weather resistance, it should not be treated as a replacement for proper waterproofing or building-envelope protection.
Measure the wall height and width at several points rather than relying on a single measurement. Record the positions of windows, doors, corners, drainage outlets, and other architectural features. These measurements help determine panel quantities, cutting requirements, joint positions, and the most efficient installation direction.
Store the panels on a flat, dry surface away from direct sunlight before installation. Allow the materials to adjust to site conditions according to the manufacturer’s recommendations. This is particularly important when working with materials that experience dimensional changes as temperatures fluctuate.

2. Install and Align the Subframe
A stable subframe is essential for long-lasting exterior wall cladding. Depending on the project design and manufacturer specifications, installers can use galvanized steel, aluminum profiles, or treated structural battens.
Begin by marking horizontal or vertical reference lines on the wall according to the intended panel direction. Install the supporting profiles perpendicular to the panels so that every panel receives adequate support.
For example:
- Horizontal WPC panels generally require vertical supporting battens.
- Vertical WPC panels generally require horizontal supporting profiles.
- Larger facade systems may require additional intermediate supports.
Determine the batten spacing according to the panel dimensions, wind-load requirements, and manufacturer’s installation instructions. Do not assume that one spacing specification applies to every WPC profile.
Use suitable mechanical anchors for the substrate, ensuring that each fixing point provides sufficient holding strength. Check the frame with a spirit level and straightedge throughout installation. Uneven battens can cause visible waves, inconsistent joints, and unnecessary stress on the panels.
An appropriate drainage and ventilation cavity should also be maintained behind the cladding. Provide suitable openings and detailing at the top and bottom of the facade to allow moisture drainage and airflow, while incorporating insect protection where required.
3. Choose the Correct Panel Fixing Method
Facade composite panels can use different fixing systems depending on their profile design and intended application. The most common methods include concealed clip fixing, mechanical screw fixing, and manufacturer-designed interlocking systems.
Concealed clips are commonly used with grooved WPC cladding profiles. Position the first panel carefully, secure it to the supporting battens using compatible clips, and check its alignment before continuing. Install subsequent panels by engaging their edges with the previous row’s connection system.
For profiles designed for direct mechanical fixing, use corrosion-resistant screws suitable for outdoor exposure. Fix through the designated fixing zones rather than drilling randomly through the visible surface. Pre-drilling may be necessary to reduce the risk of splitting or cracking, particularly near panel ends.
Some systems require fixed-point and sliding-point connections to accommodate thermal movement. Follow the manufacturer’s specified fixing arrangement rather than tightening every connection rigidly.
Avoid mixing clips, screws, and accessories from unrelated systems unless their compatibility has been confirmed. Incorrect fixing components can compromise panel engagement, reduce holding strength, and create problems during temperature changes.
4. Allow Expansion Gaps and Control Panel Movement
Thermal expansion is one of the most important considerations when installing WPC facade panels. Composite materials can expand and contract as outdoor temperatures change, and insufficient clearance may lead to buckling, joint separation, or pressure against surrounding structures.
Leave the specified expansion gaps at panel ends, corners, window openings, and other fixed obstructions. The required clearance depends on panel length, material formulation, installation temperature, and the manufacturer’s technical guidance.
For longer facade runs, use the recommended joint connectors or expansion-joint profiles. Avoid forcing panels tightly against one another or sealing every joint with rigid materials.
Pay particular attention to the following locations:
- Panel ends meeting external corners.
- Connections around window and door frames.
- Transitions between different facade materials.
- Areas where panels meet fixed structural elements.
- Long continuous wall sections exposed to significant temperature changes.
Never assume that a small visible gap will be sufficient for every installation. The correct allowance should be calculated or selected using the product manufacturer’s expansion recommendations.
5. Cut and Finish Panels Correctly
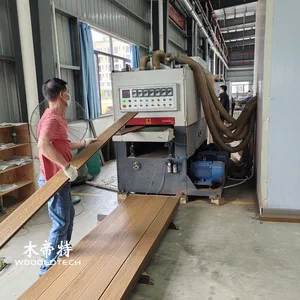
Accurate cutting improves both installation efficiency and the finished facade appearance. Use a suitable circular saw or miter saw with a sharp, fine-tooth blade designed for composite materials.
Measure each panel before cutting and mark the cutting line clearly. Support the material along its length to prevent vibration, chipping, or uneven edges. When making multiple cuts, check dimensions regularly instead of relying entirely on the first measurement.
For openings around pipes, electrical fixtures, and other penetrations, use appropriate drilling or cutting tools. Avoid placing oversized openings close to panel edges, and maintain the required movement clearance around penetrations.
After cutting, remove loose debris and inspect the edges. Use compatible end caps, corner trims, starter profiles, and finishing accessories to achieve a neat appearance. Where visible edges remain exposed, follow the manufacturer’s recommended finishing method.
Wear safety glasses, hearing protection, and a suitable dust mask during cutting. Keep the work area clean and use dust extraction where practical.
6. Common Installation Mistakes to Avoid
Even high-quality WPC cladding can develop problems when installation procedures are overlooked. Several mistakes occur repeatedly on outdoor facade projects.
First, installing panels directly against an uneven wall without correcting the supporting structure often results in a distorted appearance. The subframe should be properly aligned before the first panel is fixed.
Second, insufficient expansion clearance can cause panels to push against one another during hot weather. Installers should calculate the required gaps instead of copying dimensions from unrelated projects.
Third, inadequate ventilation and drainage behind the facade can allow moisture to accumulate. A properly designed cavity and suitable flashing details help protect the underlying building structure.
Fourth, using ordinary indoor screws or incompatible fixing clips can result in corrosion, loose connections, and premature system failure. Select accessories specifically approved for the exterior cladding system.
Finally, overtightening screws or rigidly fixing every panel connection can restrict natural movement. Follow the specified fixing sequence and distinguish between fixed and sliding connections where the system requires them.
7. Final Inspection and Long-Term Maintenance
After installation, inspect the entire facade before removing scaffolding or access equipment. Check panel alignment, joint consistency, corner details, fixing security, and the condition of all finishing accessories. Confirm that drainage openings remain clear and that the ventilation cavity has not been blocked.
WPC facade panels generally require less maintenance than traditional timber cladding, but periodic inspection remains important. Clean the surface with water, a soft brush, and a mild detergent when necessary. Avoid aggressive chemicals, abrasive cleaning tools, and high-pressure washing beyond the manufacturer’s permitted limits.
Inspect the facade periodically for loose trims, damaged panels, blocked drainage paths, and signs of movement around joints. Pay additional attention to exposed corners and areas around windows and doors, where weather penetration is more likely.
For commercial buildings, residential developments, and large exterior renovation projects, keeping installation records is also useful. Documenting panel batches, fixing components, subframe spacing, and installation conditions makes future maintenance and replacement easier.
A properly installed facade composite panel system depends on more than the quality of the panels themselves. Careful subframe preparation, compatible fixing components, controlled expansion gaps, accurate cutting, and effective drainage all contribute to a stable and attractive exterior facade that performs reliably over time.