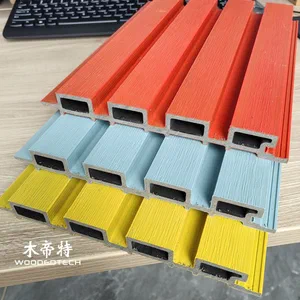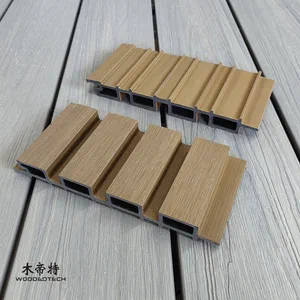
Composite Cladding for Shed: Durable, Low-Maintenance Building Solutions
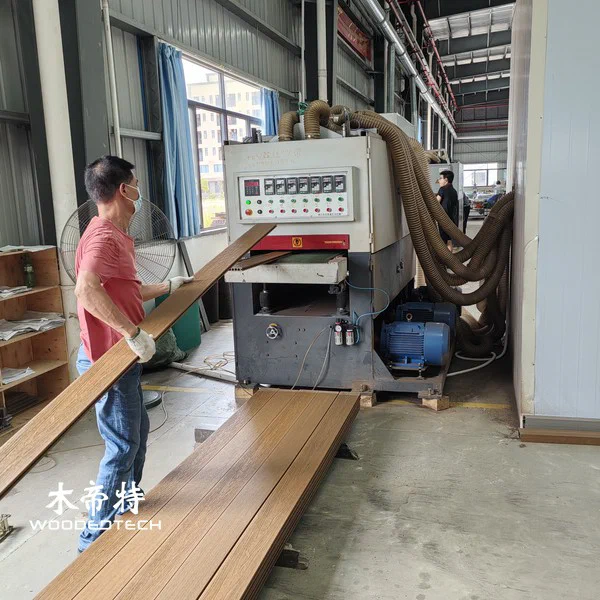
Composite cladding is a practical way to protect a garden shed from everyday weather while creating a clean, attractive exterior. Made from a blend of wood fibres and thermoplastics, WPC (wood plastic composite) cladding offers the natural appearance of timber with lower maintenance requirements, making it a suitable choice for sheds, storage buildings, workshops, and garden outbuildings.
1. Why Choose Composite Cladding for a Shed?
Traditional timber cladding can look attractive, but it requires regular painting, staining, and sealing to protect it against moisture and UV exposure. Composite cladding offers an alternative for property owners who want a durable exterior without frequent surface treatments.
Key benefits include:
- Moisture resistance: Quality WPC cladding helps resist water absorption, reducing the risk of swelling, splitting, and decay.
- Lower maintenance: Routine cleaning with water and mild detergent is generally sufficient.
- Weather resistance: Outdoor-grade composite boards are designed to withstand changing temperatures and exposure to sunlight.
- Consistent appearance: Factory-produced colours and wood-grain finishes provide a uniform exterior.
- Design flexibility: Available in different profiles, textures, and colours to suit modern and traditional garden buildings.
For shed applications, select composite shed cladding specifically designed for exterior use. Check the manufacturer’s technical specifications for UV resistance, moisture performance, temperature limits, and installation requirements before purchasing.
2. Prepare the Shed Structure and Subframe
A reliable installation starts with a stable, dry, and properly aligned supporting structure. Composite boards should never be installed directly onto an unsuitable shed wall without checking its condition and providing the required ventilation and fixing support.
Begin by inspecting the existing shed walls. Repair loose boards, damaged framing, and areas affected by water ingress. The wall structure must be sufficiently strong to support the additional weight of the cladding system.
Next, prepare the subframe using treated timber battens or compatible metal profiles. The choice depends on the shed construction, local weather conditions, and the composite manufacturer’s recommendations.
Follow these preparation steps:
- Remove dirt, loose paint, and any deteriorated material from the existing wall.
- Check that the wall is structurally sound and reasonably level.
- Install a suitable weather-resistant membrane where required by the wall design.
- Fix vertical battens securely to the supporting structure.
- Maintain consistent batten spacing according to the cladding manufacturer’s installation specifications.
- Check the subframe alignment using a spirit level before installing any boards.
A ventilated cavity behind the cladding is particularly important. It allows moisture to drain and air to circulate, helping reduce condensation and moisture-related problems. Provide suitable drainage and ventilation openings at the bottom and top of the system, protected against insects where necessary.
3. Measure, Cut, and Position the Composite Boards
Accurate measurements help reduce material waste and create a professional finish. Measure the height and width of each shed wall, accounting for doors, windows, corners, and other architectural details.

Calculate the required board quantity using the effective coverage width rather than the overall board width. Include additional material for cutting, trimming, and installation adjustments.
Before cutting, allow the boards to acclimatise according to the manufacturer’s instructions. Composite materials can expand and contract with temperature changes, so installation conditions should be considered.
Use appropriate woodworking tools, such as a circular saw or mitre saw with a suitable fine-toothed blade. Wear safety glasses, gloves, and suitable dust protection when cutting WPC materials.
For cleaner results:
- Measure and mark each board before cutting.
- Support the board properly to prevent vibration and uneven cuts.
- Use a suitable blade to minimise edge damage.
- Remove cutting dust and check the finished edges.
- Pre-drill fixing holes if required by the manufacturer’s instructions.
For shed corners, door frames, and window openings, measure carefully and use compatible corner trims or finishing profiles to cover exposed edges.
4. Install the Cladding and Select the Correct Fixing Method
Once the subframe is ready, begin installing the composite boards according to the selected cladding profile. Horizontal installation is a popular choice for garden sheds, although vertical composite cladding can create a more contemporary appearance.
For horizontal installation, work from the bottom upwards. Position the starter profile or first board accurately, checking that it is level before securing it.
Most WPC cladding systems use one of two fixing methods:
- Hidden clip fixing: Specially designed clips engage with the board grooves and attach to the battens. This creates a neat exterior without visible screw heads.
- Face fixing: Suitable exterior-grade screws secure the boards directly to the supporting battens. Follow the manufacturer’s guidance on screw position, hole size, and fixing depth.
Do not overtighten screws or force clips into position. Excessive pressure can restrict natural movement or damage the board profile. Use corrosion-resistant fixings suitable for outdoor exposure and compatible with the cladding system.
For vertical boards, follow the manufacturer’s recommended fixing arrangement and ensure the supporting battens provide adequate attachment points.
At corners and around openings, install matching trims, edge profiles, or flashing details as required. These components help protect exposed edges and create a consistent finish.
5. Allow Expansion Gaps and Complete the Finishing Details
One of the most important aspects of composite cladding installation is allowing sufficient room for thermal expansion and contraction. WPC materials respond to temperature changes, and insufficient clearance can cause boards to buckle, distort, or place excessive pressure on fixing points.
Leave the manufacturer’s specified expansion gaps between board ends, corners, adjoining structures, and other fixed surfaces. The required clearance depends on board length, installation temperature, material formulation, and product design.
Additional installation considerations include:
- Maintain the specified spacing between adjacent boards.
- Avoid tightly joining board ends unless the system is specifically designed for this arrangement.
- Position joints over suitable supporting battens.
- Keep drainage and ventilation openings unobstructed.
- Install compatible corner trims and finishing accessories without restricting board movement.
- Check that door and window openings remain clear after installation.
Before completing the project, inspect the entire shed exterior. Check that all clips and screws are secure, boards are aligned, and finishing profiles are correctly fitted.
6. Composite Decking Around the Shed and Routine Maintenance
Many shed projects also include a small entrance platform, access path, or surrounding outdoor floor. WPC decking can complement composite wall cladding by creating a coordinated exterior design.
Decking requires a separate subframe system designed to support the expected loads. Install joists on a stable foundation, maintain the specified joist spacing, and provide adequate drainage beneath the boards. Use compatible hidden clips or approved face-fixing screws, following the decking manufacturer’s installation guide.
Avoid assuming that wall cladding boards and decking boards are interchangeable. They are designed for different structural and loading requirements.
Although composite products require less maintenance than traditional timber, periodic cleaning and inspection remain important.
Recommended maintenance practices include:
- Wash the cladding periodically using clean water and mild detergent.
- Use a soft brush to remove accumulated dirt, dust, and organic debris.
- Clear leaves and other obstructions from ventilation and drainage openings.
- Inspect screws, clips, corner trims, and exposed edges regularly.
- Remove mould or algae using a cleaner approved for the specific WPC product.
- Avoid aggressive chemicals, abrasive tools, and high-pressure washing unless expressly permitted by the manufacturer.
For outdoor decking, remove standing water and debris regularly, particularly around the shed entrance and beneath furniture or planters.
A properly installed composite cladding system can give a garden shed a more refined appearance while reducing the ongoing maintenance associated with conventional timber. By preparing a stable subframe, selecting suitable fixing methods, allowing adequate expansion gaps, and following a consistent maintenance routine, installers can achieve a durable and attractive exterior that performs well in everyday outdoor conditions.
Related Articles
 Teak Composite Cladding: Performance, Durability, and Industrial Applications
 wood plastic composite wall cladding philippines provides weather resistant exterior solutions for tropical climates
 Composite Decking Wall Panels: Applications, Benefits, and Market Trends
 WPC Wall Panels Exterior: Performance, Applications, and Selection Guide